Welding Tips by my welder friend:
Larry Brewer
Larry Brewer was a good friend & a great welder. He was kind enough to share some welding tips with me:
1) He shared some general but important arc welding & cutting torch tips.
2) He emphasized that electrode control & that how you "aim" the
arc into the puddle were critical for smooth & strong welds.
3) Below are some illustrations, pics, & comments to help share
these tips with you:
* Hold a close arc, about 1/8" inch, then adjust the heat & speed of travel to maintain an even, smooth bead.
* In the assembly of any project, start with tacks only, until all is square & level, then weld equally at all corners to prevent warpage.
* If the weld is done properly, the only way to add strength is to add more steel with gussets or other bracing.
* Your cutting torch should be clean, & the gauges should be set
according to the tip size & material thickness.
* Set the gas pressure at the torch by opening the gas valve until the flame separates from the tip, then back off till it re-
attaches.
* Then set the oxygen for a short bright blue flame. This is the
maximum heat you can get from that tip.
* Round tubing "wrinkle bend": Heat the pipe on the inside of
the bend about 1/3 of the way around it, & bend toward the heated area.
* Heavy wall pipe needs to be heated all the way around,
then keep moving the heat along the pipe while bending.
* Don't overheat pipe or it will collapse.
* After welding a bead, & before re-starting, knock off the slag to
ensure good continuous penetration.
* Clean off all slag before painting, and use a primer coat to
prevent rust.
* The better the fit, the easier the weld.
* If you see "spots" after raising your hood, you may need to use a darker lense. (Cutting torch or arc welder).
* If you're doing a job for pay, you can charge by the hour, by the job, or by the rod used. ($5 per rod, $20 minimum charge)(adjust pricing for the current market).
* It's tough to do heavy equipment jobs without the proper tools: Chain fall, crane (if needed), & a 300 AMP welder.
* Remember that the customer is your boss, & he/she will
expect you to do the job with little sleep!
Larry went to "welder's heaven" a few years ago. But his welding tips will live on right here.
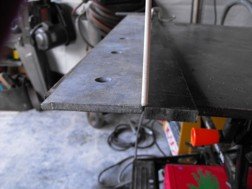
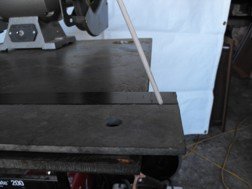
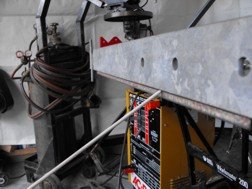
Below are illustrations and welding tips to show how Larry feels that you should
handle a 1/2" welding job.(with 4 passes).


The above illustrations show the order of events for an example 1/2" butt weld.
* Bevel the pieces & separate slightly for a good penetration on the "root" pass.
* Run a straight "stringer" bead to fill all the root gap.
* Run 2 more weaved beads to fill most of the rest of the weld.
* Then use a wider weave to cover & complete the weld, with a slight raised bead to ensure the whole thing is penetrated.
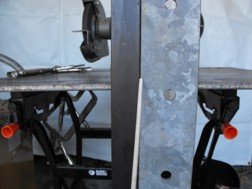
Flat, butt type joint welding tips:
* The end view shows holding the rod at right angles to the 2 pieces being welded.
* The side view shows that you need to keep the electrode angled so that the arc is directed toward the puddle. This helps with your view & with proper penetration.
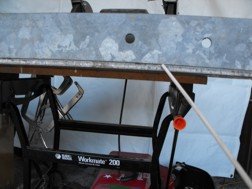
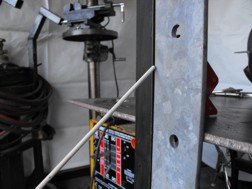
Butt joint in the horizontal position welding tips:
* Keep the rod at a dropped angle to the metal pieces.
* Aim the arc upward for preheating the metal & to help the puddle from dripping out. But also angled away from perpendicular for your view & to direct the arc at the puddle.
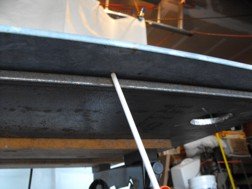
Vertical Position, butt joint:
* The rod is at right angles to the pieces.
* But it's also angled downward.
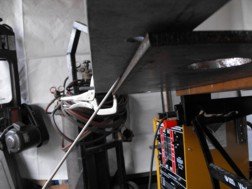
Overhead butt joint welding tips:
* The rod is at a steep angle but not perpendicular.
* For this type overhead, you also need to angle the rod to direct the arc to better weld BOTH pieces. If it were a simple overhead butt weld, you would be at right angles to them both.
Thanks Larry!
And thanks to YOU for reading along!
May you rest in peace Larry Brewer. And all my best to your
wonderful daughter & my great friend, Larrine!
Return to Arc Welding MAIN PAGE HOME